speaker setup procedure
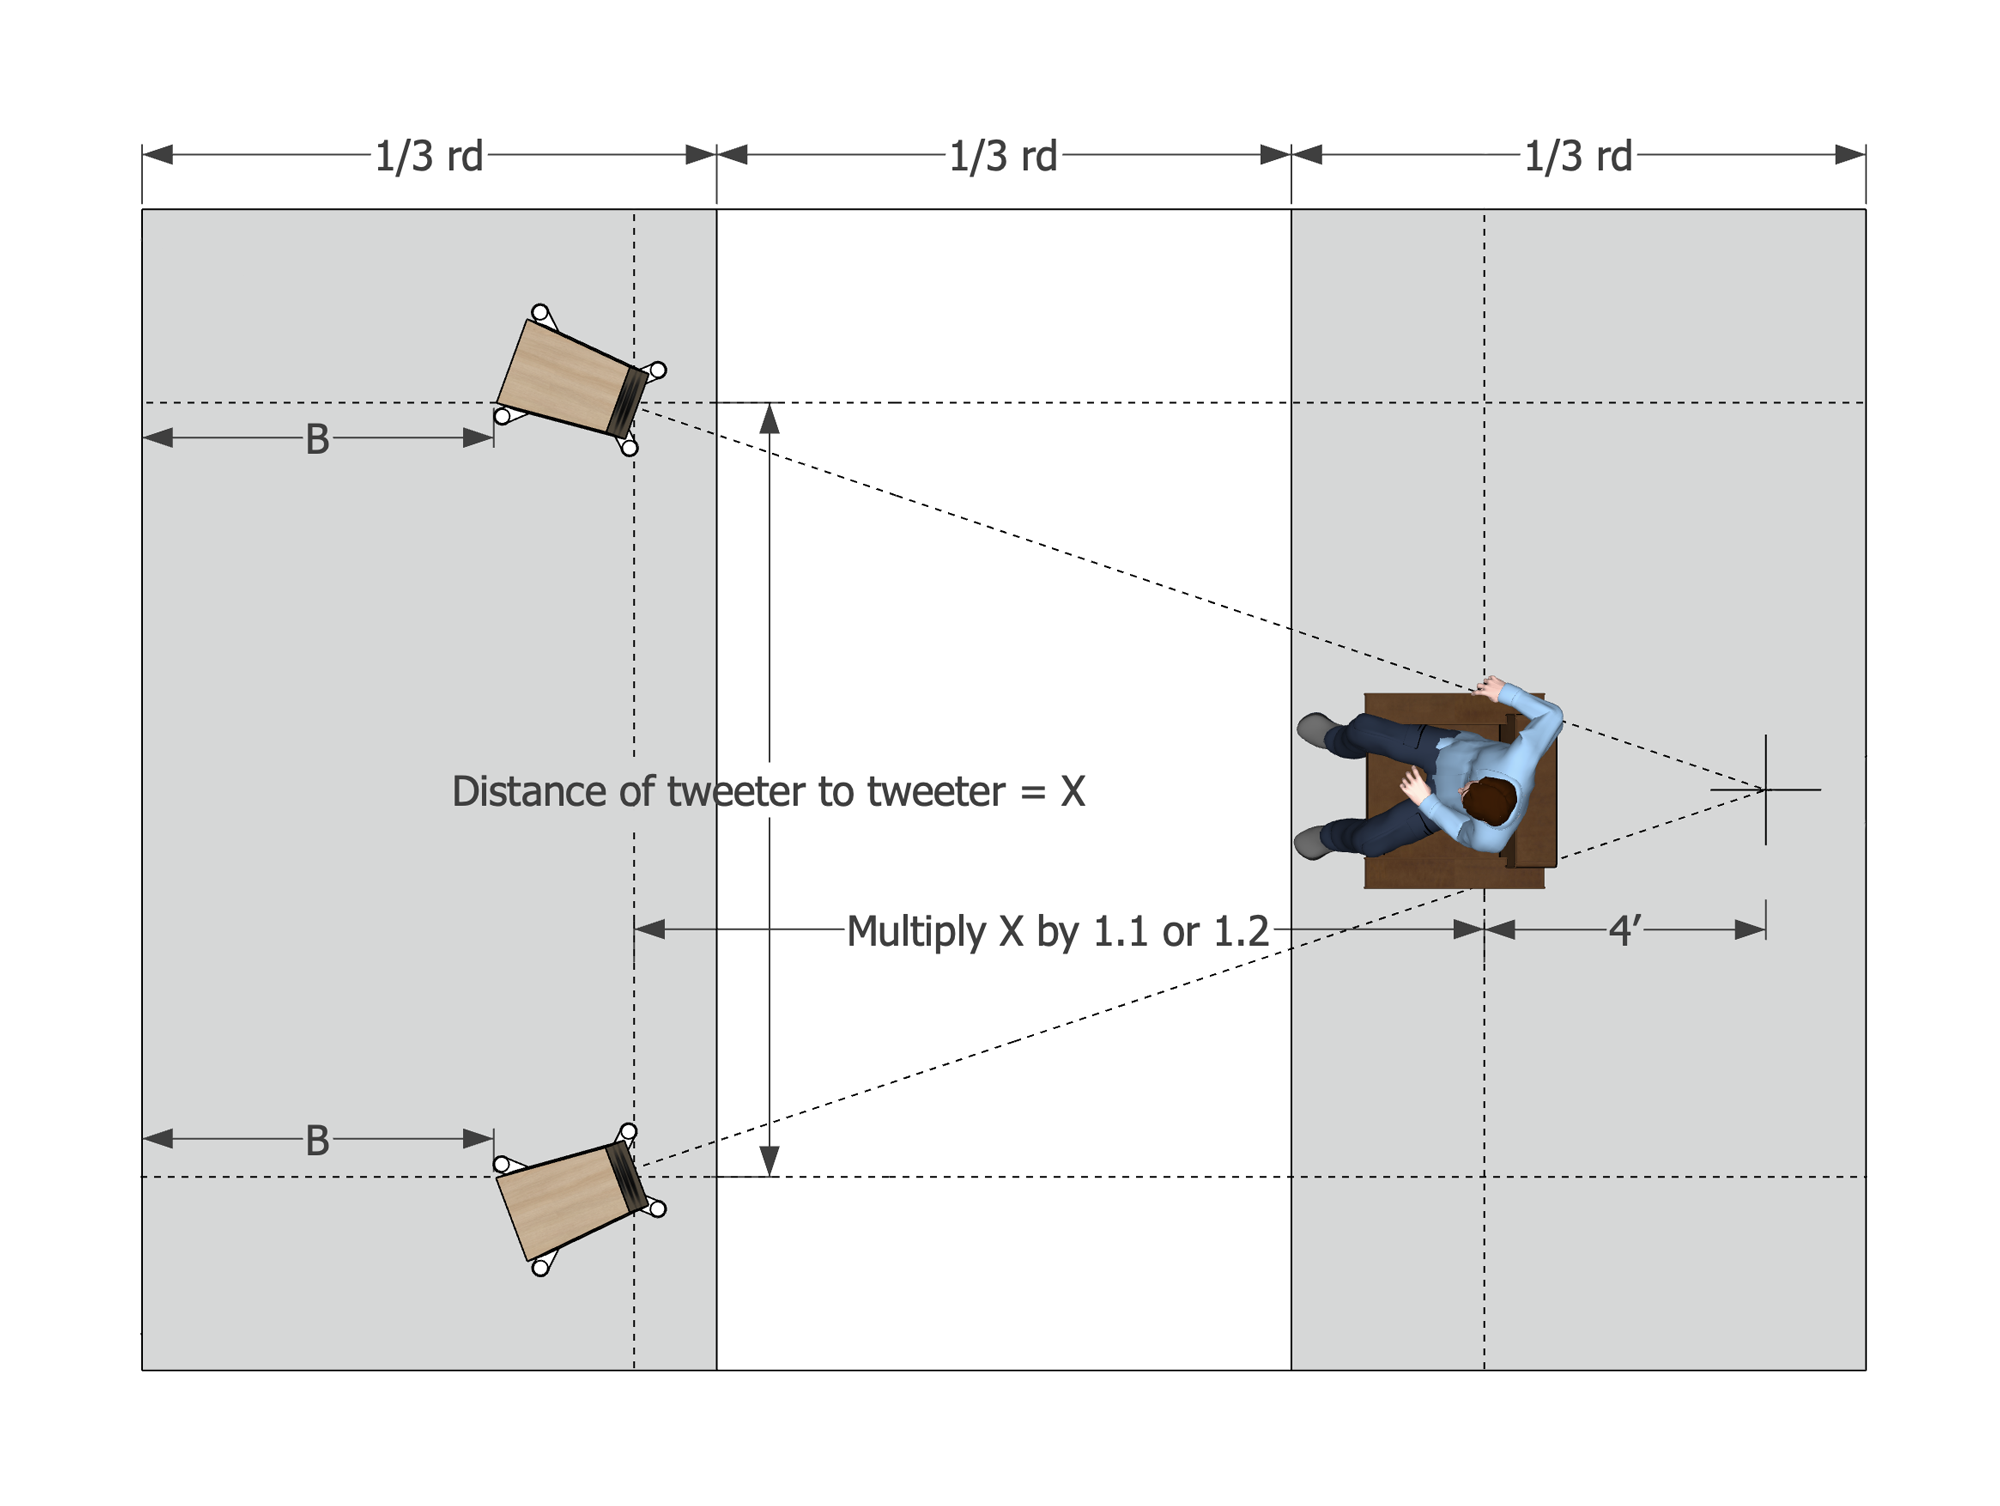
Have a look at the attached drawing. It’s a good starting point, but don’t be afraid to make small adjustments by ear. Every room is different.
before you begin
Before starting, gather a few simple tools. They will make the setup process much easier and far more accurate.
room layout
Before positioning anything, think of the room as being divided into three equal sections from front to back.
This layout helps minimize many of the room interactions that negatively affect imaging, depth, and bass performance. While every room has its own limitations, beginning with this general rule gives you an excellent foundation before fine-tuning the speaker placement.
Think of this as the framework for the room. Once the speakers and listening position are in these general areas, the fine adjustments described below will allow the system to perform at their best.
step 1 – find the best bass response
This may sound a little unconventional, but it works remarkably well.
First, let the system play for about an hour before doing any serious listening. The electronics and speakers need a little time to warm up and stabilize.
Next, disconnect one speaker cable from the amplifier so that only one speaker is playing. I want you listening to a single speaker only.
Play:
Jennifer Warnes – “Ballad of the Runaway Horse”
Turn the volume up to a healthy listening level. You’ll probably get tired of hearing this song—but that’s okay.
Only listen to the bass. Ignore everything else.
Have a friend slowly move the speaker forward and backward along the dotted line shown on the drawing (parallel to the side wall).
Once you’re close, fine-tune the position using ½-inch increments until you’ve found the absolute best bass response.
When you’ve found it, mark that location.
Now move the second speaker into the mirror-image position, ensuring both speakers are exactly the same distance from the front wall.
At this point, you’re finished adjusting front-to-back placement. Resist the temptation to keep moving the speakers—you’ve already optimized the bass.
step 2 – set the speaker spacing
Now we’ll optimize image size and vocal scale.
Play:
Dean Martin – “If You Were the Only Girl”
Measure the distance from tweeter to tweeter and always move both speakers equally.
Listen to Dean’s voice.
Adjust the spacing until Dean sounds as though he’s naturally seated between the speakers, with a life-sized, believable vocal image.
step 3 – adjust toe-in
Toe-in is the final adjustment, and it’s also the most personal.
A good starting point is to aim each speaker so the laser intersects at a point approximately 4 feet behind your listening position.
From there, move the target point about 6 inches in either direction, re-aim both speakers, and listen again.
Small toe-in changes can affect image focus, soundstage width, tonal balance, and overall presentation.
There isn’t a universally “correct” setting here.
Trust your ears. When everything locks into place, you’ll know it.
final thoughts
Remember that no two rooms behave exactly alike. The dimensions, construction, furnishings, and acoustics of your room all influence the final result.
The process above isolates one variable at a time—first bass response, then image scale, and finally toe-in. By resisting the temptation to adjust multiple things simultaneously, you’ll arrive at the best possible setup much more quickly.
Once you’ve completed these steps, stop worrying about the equipment, sit back, and enjoy the music. That’s what this hobby is all about.